
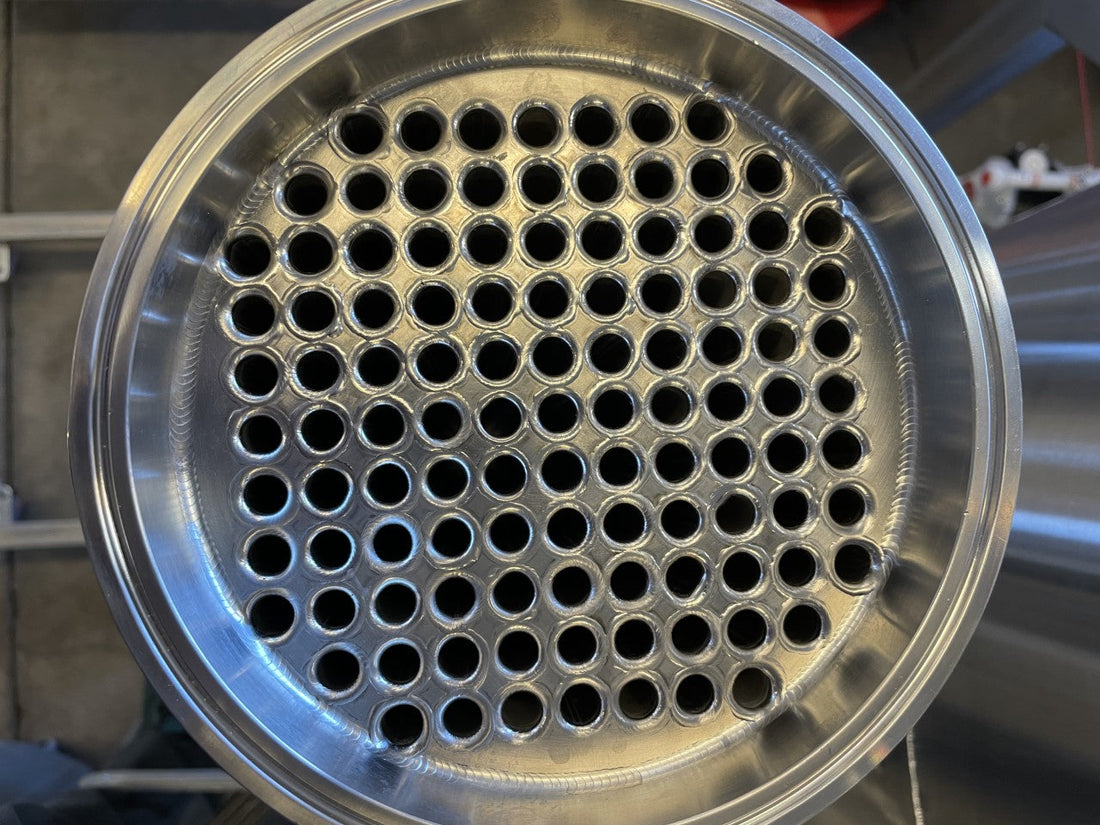
Stainless Steel Tube in Shell Condensers: Design, Fabrication and Sizing
Share
A tube in shell keeps all of its surface working through the whole recovery. A solvent tank loses half of its to the liquid it is collecting.
How we build them
| 6 inch | 4 inch | Auxiliary 6 x 12 | |
|---|---|---|---|
| Tubes | 101 at 3/8" x 0.035" wall | 86 at 3/8" x 0.035" wall | 98 at 3/8" x 0.065" wall |
| Shell | 6" OD x 0.109" sanitary tube | 4" OD x 0.065" sanitary tube | 6" heavy duty, thick end plates |
| Flow | Vapor and solvent in the tubes, coolant on the shell side | Same | Same |
| Baffles | 3, about 50 percent cut, so coolant snakes across the bundle | ||
| Tube ends | Flush with the tubesheets, set back 1" (25 mm) from each ferrule face | Same | Same |
A 6 x 48 has 46 inch tubes. The auxiliary unit bolts onto any 6 inch tri-clamp solvent tank with no rack changes.
Why the auxiliary unit has thicker tubes
Tubes in a pressurized shell see external pressure, and a tube's collapse rating under external pressure is far lower than its burst rating under internal pressure. Customers running the auxiliary condenser on liquid CO2 crushed thin wall tubes, so it moved to 0.065 inch wall. The same logic applies to any condenser you size: check the tubes for collapse, not just burst.
Why a tube in shell out-condenses a tank
On paper the 100 lb solvent tank has more surface. In practice, halfway through a recovery about half of it is under liquid solvent, and a wetted wall condenses nothing. The tube in shell drains as it condenses and stays empty, so all 5,761 square inches (3.72 m²) keep working for the whole run.
Where it goes
- Auxiliary: bolted on top of a 6 inch tri-clamp solvent tank. No rack changes.
- Inline: between the recovery vessel and the solvent tank.
- Inline with the sieve: recovery vessel, molecular sieve, tube in shell, then solvent tank, with some modification.
Design criteria
- Heat load sets the surface area, tube count and coolant choice.
- Material compatibility. 304 or 316 stainless for hydrocarbons and glycol coolants.
- Pressure, internal and external. The tube side sees system pressure, the shell side sees coolant pressure, and the tubes must handle both.
- Flow. Coolant velocity across the tubes drives the film coefficient. Baffles force the coolant across the bundle instead of down its center.
- Temperature swings. Tubes and shell expand differently between chilled and room temperature, and the design has to allow it.
Fabrication
The difficult part is the tube to tubesheet joint. Every one of 101 tubes is a potential leak path, and each tube to tubesheet weld has to be right. Quality control at each stage matters more than speed: a leak between the tube side and the shell side puts coolant in your solvent or solvent in your chiller.
Sizing the coolant side
At steady state the heat removed from the vapor equals the heat picked up by the coolant:
Q = m × Cp × ΔT
Q, heat transfer rate (kW). m, coolant mass flow (kg/s). Cp, coolant specific heat (kJ/kg·K). ΔT, coolant temperature rise (K).
Rearranged, the coolant flow needed for a given heat load and allowed temperature rise is m = Q / (Cp × ΔT), and the coolant outlet temperature for a given flow is Tout = Tin + Q / (m × Cp). The coolant warms as it removes heat.
The overall heat transfer coefficient combines the tube side film, the tube wall and the shell side film, and a fouling factor accounts for deposits that build up over time. These equations hold at steady state. During chill-down and at the start of recovery the steel and the coolant inventory also store heat, so real systems lag the calculation.
Ask the shop for our tube and shell calculator if you want to run surface area and coolant volume for a specific size.
Sources. N.B. Oler tube in shell build data (2026); N.B. Oler REF-TS-01 Tube and Shell Condenser, Rev. 2026.1; N.B. Oler REF-TB-01 Tubing Burst Pressure (external pressure note).